There are two ways you can save your tables for future use:
Save the table for your own future use, which allows you to easily reload that table again when you log back in to SuperWEB2. This option is only available to logged in users, it is not available to guest users. Typically these tables will be private to your user account only, although your administrator may have configured the ability for you to save tables to a shared folder that is accessible to specific other users.
(From 9.18.1 onwards): Create a shareable link to the table. Shareable table links can be loaded by anyone with the link (provided they have access to the dataset and fields in the table). Shareable links can be created by all users, including guests.
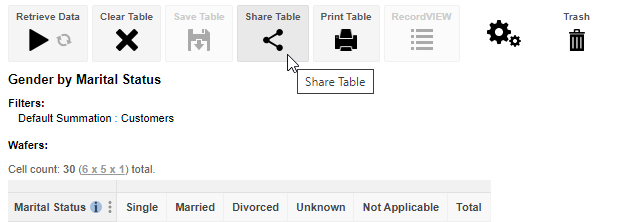
Share a Table
Click the Share Table icon to create a shareable link to the current table:
This feature is available from version 9.18.1 onwards. If you do not see the Share Table icon, then your administrator has disabled the feature.
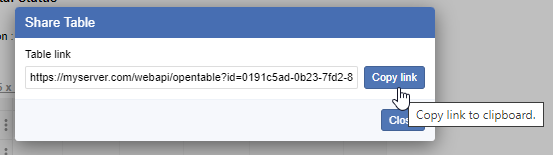
The link displays. Click Copy Link to save the URL to the clipboard.
You can now paste the link to any other application, such as email.
Anyone who clicks the link will be taken directly to the table in SuperWEB2:
If the user is already logged in to SuperWEB2 when clicking the link, the table will open using their current session.
If the user is not logged in, it will either open in guest mode (if enabled and provided that the dataset and fields are accessible to guest users) or SuperWEB2 will redirect to the login form so that the user can log in with an account that has access to this dataset and fields; once logged in, the user will be redirected to the table.
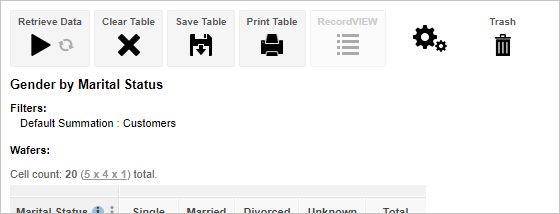
Save Tables
Click the Save Table icon to save the current table:
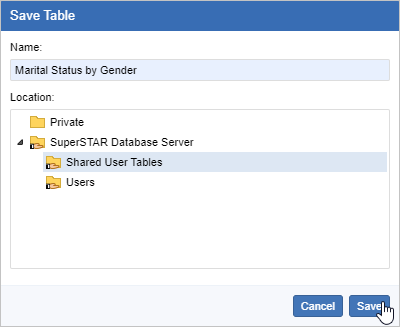
You will be prompted to select the save location and enter a name for the table. Choose your name and location and click Save:
Depending on how your system administrator has configured SuperWEB2, you may have a choice of save locations:
Choose the Private folder to save a table that is accessible to you only (this option is always available to logged in users).
Choose any of the shared folders (indicated by the shared folder symbol, ) to save a table that will be accessible to other SuperWEB2 users. You will only be able to save to a shared folder if your administrator has given you permissions to save to that folder. The folder permissions will also determine which other SuperWEB2 users will be able to access the folder. Check with your administrator to confirm how permissions have been set up in your SuperWEB2 deployment.
The name of the table must be less than 255 characters long. When you save tables to the Private folder, they must have a unique name; tables saved to a shared folder can have the same name as an existing saved shared table.
Your administrator may have configured a limit on the maximum number of private saved tables you can have at any one time. If you have exceeded this limit you will not be able to save any more private tables until you go to Manage Tables and delete some of your existing saved private tables.
Please note that this limit does not apply to shared tables.
Load Tables
You can reload saved tables one of three ways: from Table View, from Manage Tables and from Datasets.
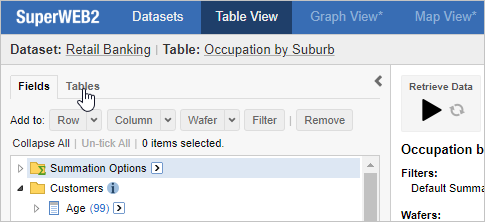
Table View
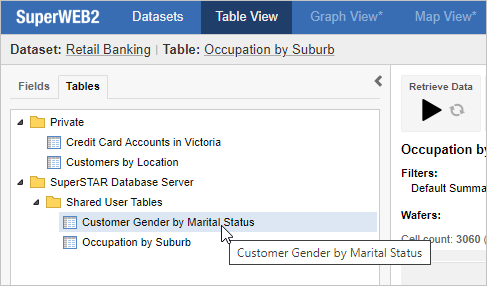
You can access saved tables direct from Table View. Click the Tables tab:
SuperWEB2 displays a list of all the saved tables you have access to for this dataset. Double-click a table to open it, or click once to select and click Open Table.
Manage Tables
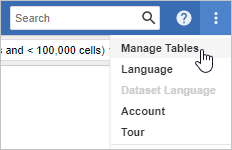
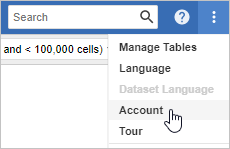
Select the Manage Tables option from the menu in the top right of SuperWEB2:
Select Manage Tables.
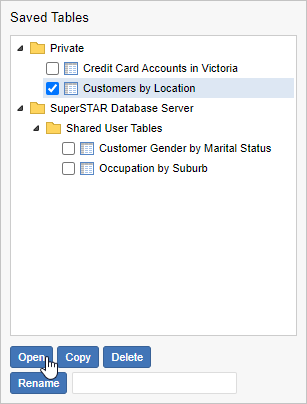
Select the table you want to reopen.
Click Open. If you currently have a table open, then SuperWEB2 displays a message warning you that any unsaved table content will be lost (this means that the selected table will replace the currently active table). Click OK.
Your saved table displays.
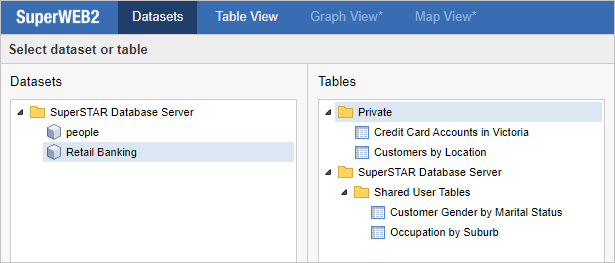
Datasets
You can also access saved tables from the Datasets tab. This is displayed when you log in to SuperWEB2, or whenever you click the Datasets link in the top left corner:
To open your saved table, click the dataset it was created from, then go to the Tables list and double-click the table name. For example:
Manage Saved Tables
Manage Tables also allows you to rename saved tables, create new copies of saved tables, and delete saved tables:
Rename and Copy are only available for private saved tables.
Rename a Saved Table
This option is available for private saved tables only:
Select the check box next to the table you want to rename.
Enter a new name in the text box.
Click Rename.
Copy a Saved Table
This option is available for private saved tables only:
Select the check box next to the table you want to copy.
Click Copy.
Delete a Saved Table
Select the check box next to the table or tables you want to delete.
Click Delete.
Click OK to confirm you want to delete the table or tables. Make sure you check that you are deleting the correct table or tables, as there is no way to undo the deletion.
Your administrator may have configured a limit on the number of saved tables you can have at any one time. You should delete any unused tables so you have enough space to continue saving your customised tables.
Change the Table Sort Order
Depending on how your administrator has configured SuperWEB2, you may be able to change the order that tables are listed in the Saved Tables tab.
To check and change this setting:
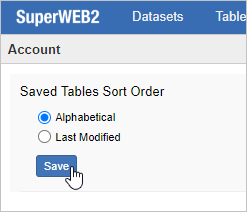
Click the menu button in the top-right corner and select Account:
Choose between Alphabetical (tables will be displayed in ascending alphabetical order) or Last Modified (the most recently modified/created tables will appear at the top of the list).
Click Save.
If you do not see this option, then this means that your administrator has turned off the ability to set this preference. Your saved tables will be displayed in the order set by your administrator (by default, this is alphabetical order).
Large Table Downloads
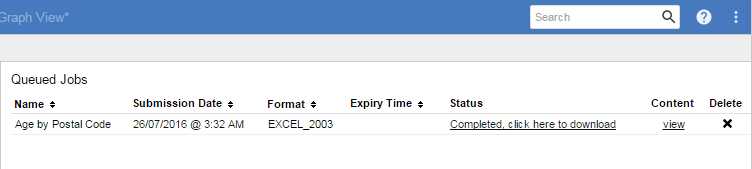
If your system has been configured to use the Job Queue Manager feature, then the Manage Tables tab may also show details of large tables that you have queued for download. You can use the options to check the status of large table queries, download any tables that have completed processing, and manually delete the tables:
See Large Tables for more information about using SuperWEB2 in large table mode.
JavaScript errors detected
Please note, these errors can depend on your browser setup.
If this problem persists, please contact our support.